Only Enterprise accounts may have more than one Site, available on request.
When logging in to your VPass account for the first time, a Demo Site is created by default
To customise this to meet your requirements…
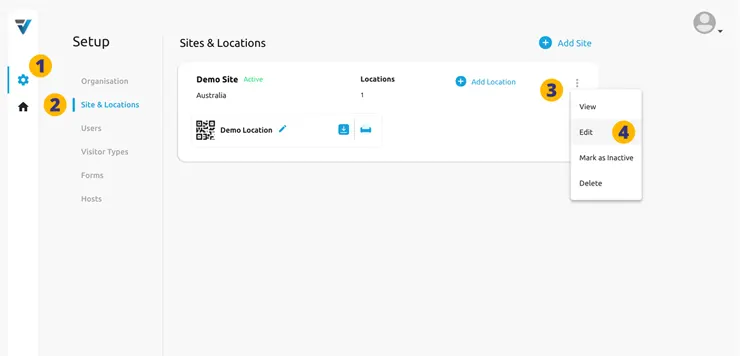
1. Go to your Admin Setup page (cog icon).
2. Select Site & Locations.
3. In the Demo Site listing, select the three dots on the right hand side.
4. A small menu will come up. Select Edit.

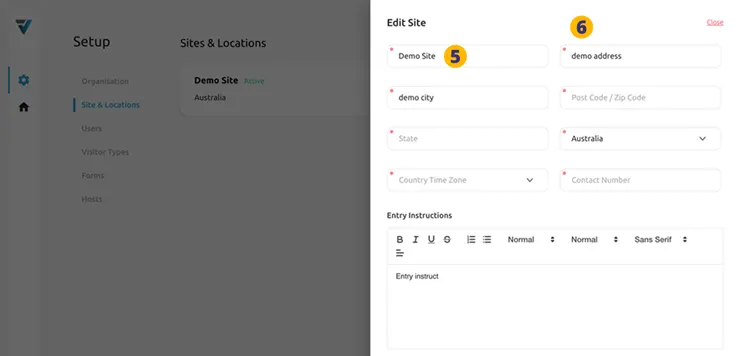
A sidebar will slide out where specifications of your Site can be entered.
5. Name the Site. If you only have one Site the name might be fairly generic like “Acme Main Office”. If it is one of two or more Sites, the name might be more specific such as “Gotham City Campus“.
6. Proceed to fill out address and contact details for your Site.
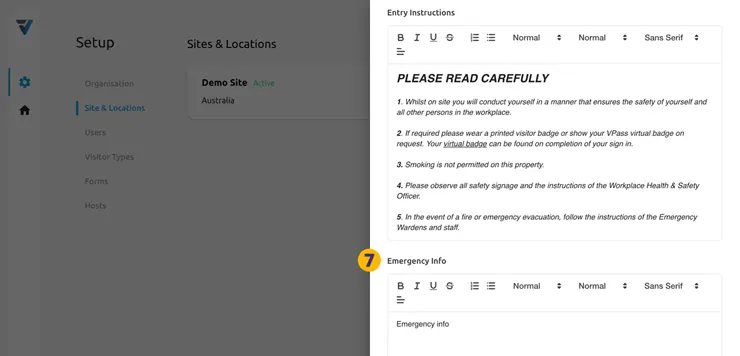
Scrolling down the page, next there is a series of five formattable text input fields (7) known as Text Elements. It is not a requirement to fill out any or each… just the ones where you wish to communicate some information to your visitors as they sign in.
Any (or none) of these five Text Elements can be dragged and dropped into place as you build specific Forms for your various Visitor Types.
To summarise the five Text Elements:
- Entry Instructions: A short list of basic behaviours and expectations for the visitor.
- Emergency Info: eg Evacuation procedures and assembly points.
- Health and Safety Info: eg Health and Safety Induction for Contractors.
- Wifi Info: The Wi-Fi network name and password details for use by visitors.
- Conditions of Entry: More detailed and specific Terms and Conditions eg: Code of Conduct.
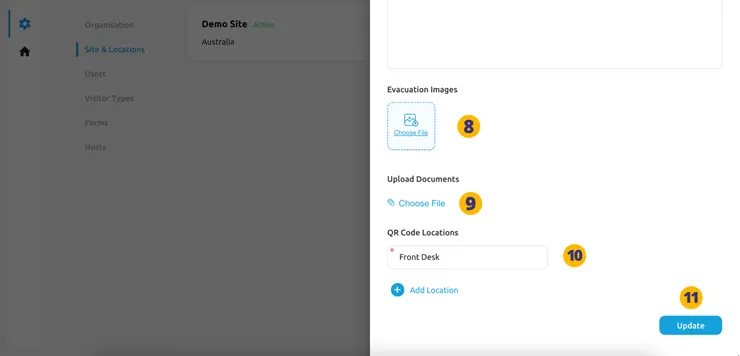
8. Additionally you may add Image(s) and PDF Documents (9) to be included as part of a visitor’s sign in process. These might show an evacuation map, an NDA document etc.
10. Name your default QR Code Location. This will be a point at which your visitors enter and leave your premises eg: your front reception desk. It is here that visitors will sign in and out by scanning a QR Code poster with their phones. Alternatively they may sign in and out at a Kiosk (tablet).
11. To complete this initial Site setup process, select Update.
V3-014


