A Form consists of one or more PAGES made up of ELEMENTS (eg: text field, drop down menu etc.) that the visitor will fill out at sign in.
This will then allow you to apply each Form to the relevant Visitor Type as they are created.
To create your first Form…
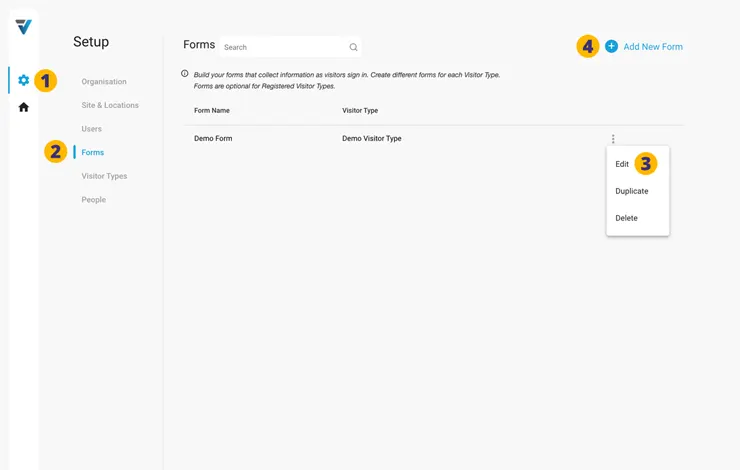
1. Go to your admin Setup page (cog icon).
2. Select Forms.
3. A demo Form has already been setup. To customise this to your needs, select the three dots on the right hand side. A small menu will come up. Select Edit.
4. NB: If wishing to create a new Form from scratch select Add New Form.
Preliminaries
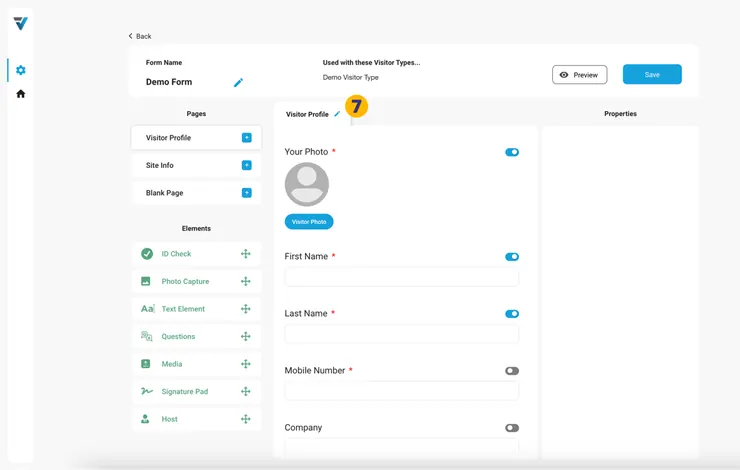
The Form edit page will appear.
5. Click on the pencil icon and name your Form eg: “Contractor”.
6. If you chose to Edit the Demo Form (Step 3 above), you will notice that the Form has been assigned to the “Demo Visitor Type” by default. Assigning Forms to Visitor Types is done when you create or Edit your Visitor Types.

The Form Builder
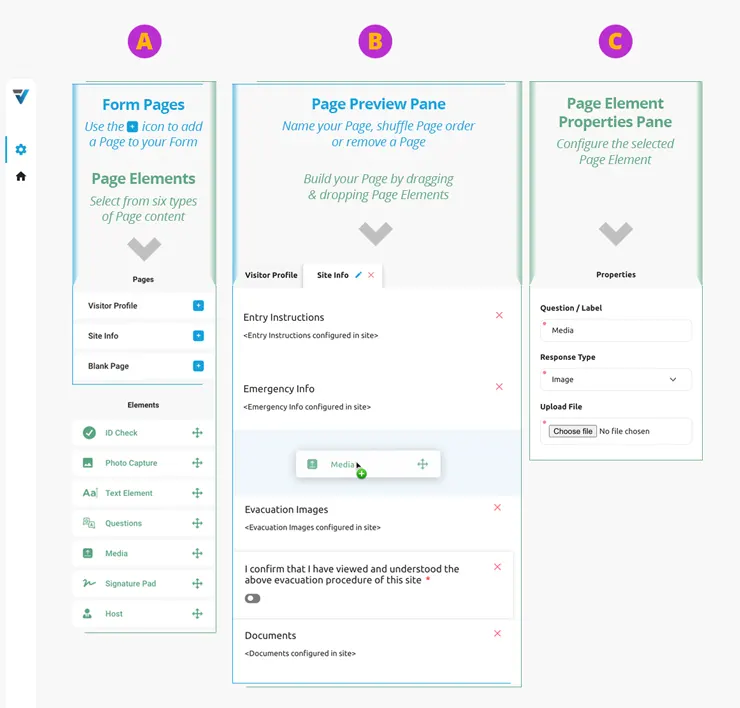
Comprising most of the Form page is the Form Builder. It is made up of three columns:
A: The Left-hand Column contains the ingredients to build your Form: Pages & Elements.
B: The Middle Column is where you compile your Pages and drag and drop Elements (content) to each Page.
C: The Right-hand Column allows you to configure the Element you have selected Middle Column.
PAGES
By default, the Demo Form will already have a single PAGE listed in the Page Preview Pane called Visitor Profile (7).
The Visitor Profile PAGE can collect basic details from the visitor such as Photo, First Name, Last Name, Phone Number, Company, Email Address etc.
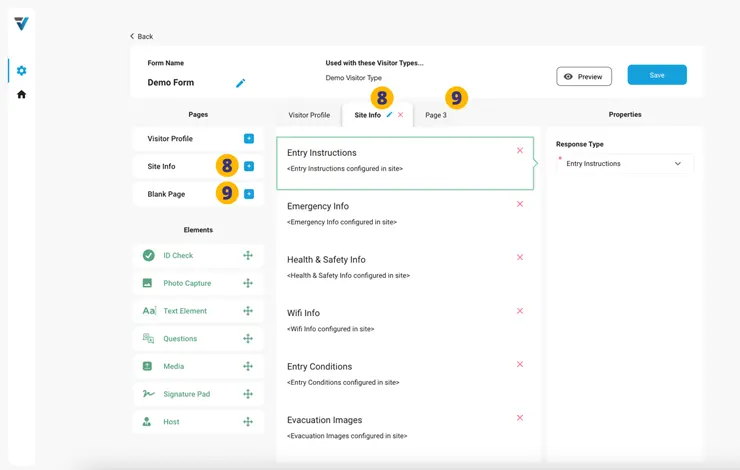
Additional Pages
If required, a Site Info page can be added by clicking the blue “+” icon (8) that can then be configured to contain any of the following eight Text Elements:
- Entry Instructions: A short list of basic behaviours and expectations for the visitor.
- Emergency Info: eg Evacuation procedures and assembly points.
- Health and Safety Info: eg Health and Safety Induction for Contractors.
- Wifi Info: The Wi-Fi network name and password details for use by visitors.
- Conditions of Entry: More detailed and specific Terms and Conditions eg: Code of Conduct.
- Images: eg an evacuation map.
- PDF Documents: eg an NDA document.
- Custom: Headings & body text.
A Blank Page can also be added if wishing to build a PAGE from scratch. Click the blue “+” icon (9) and it will appear in the middle Page Preview Pane so that you may begin to drag and drop Page Elements (content) into place.
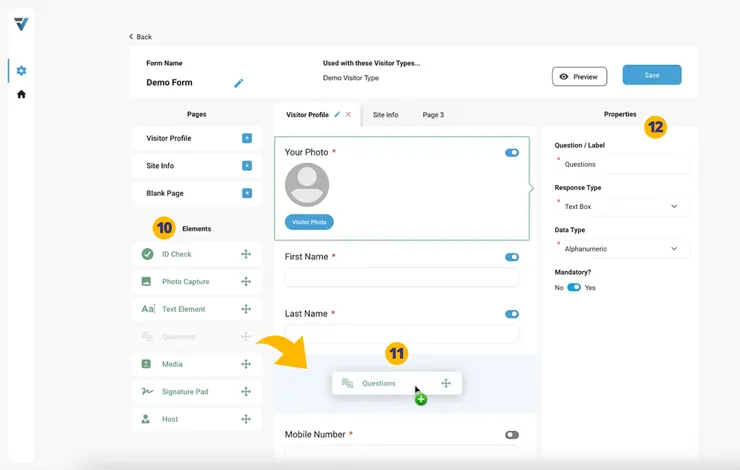
ELEMENTS
On the left hand side, underneath the three Page options is listed (in green) are page ELEMENTS (10) that can be dragged and dropped onto a PAGE (11). These are:
- ID Check: Depending on your country, there may be options to collect Child Safety IDs, Car Registration, Driver’s Licence and Vaccination Certificates.
- Photo Capture: Allows the visitor to take a photo of a document or other item as they sign in.
- Text Element: The eight options are listed above (9).
- Questions: Visitors will enter a response by either typing into a text Field or selecting single or multiple options (dropdown menu, radio buttons, checkbox etc).
- Media: Add an image, document or video. The document might be a .pdf or .doc file that the visitor reads on screen.
- Signature Pad: Collect the signature of the visitor. This is usually placed at the bottom of a page.
- Host: Add a name search field where a visitor can type the name of the person they are visiting and select it.
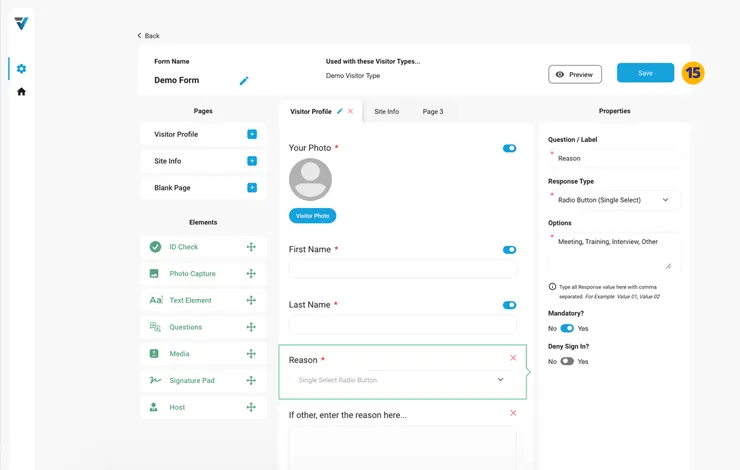
12. Select the ELEMENT in the Preview Pane and use the Properties pane to configure it.
For more details on adding the various Elements to your Page, please refer to these help articles:
Questions (add simple text field)
Questions (add drop down menu)
Questions (add radio button or checkbox)
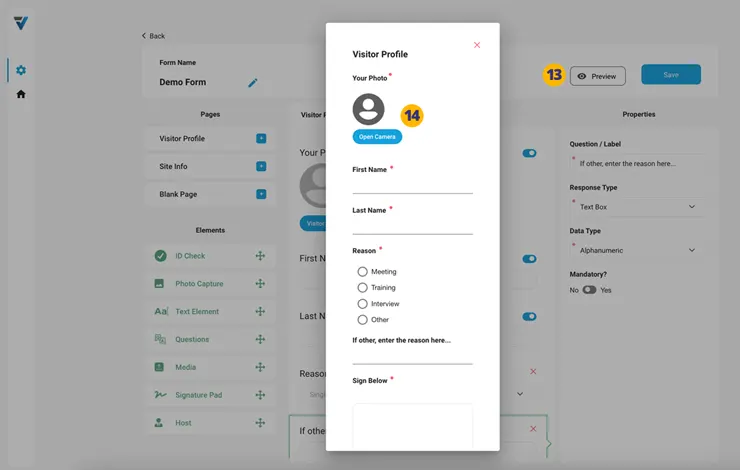
Finishing Up
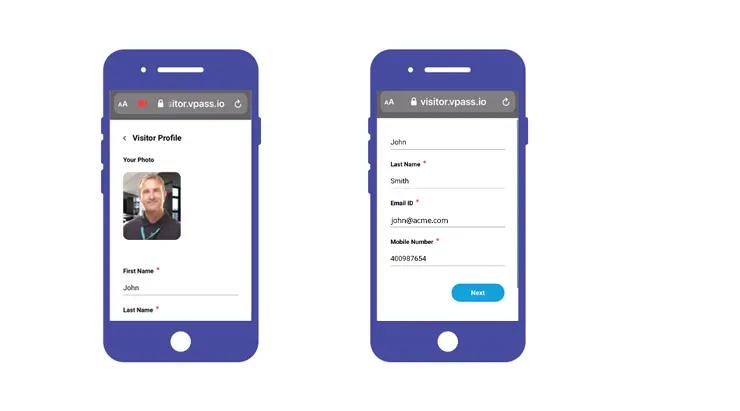
Once you are done adding your Pages and their various Elements, you may do a preview of the visitor’s sign in experience.
13. Select the Preview button. A mockup of your first create page will appear.
14. Do a test sign in.
Once you are satisfied with your Form… Save it (15). The Form is now ready to be either paired with a Visitor Type (and used for actual sign ins) or just kept un-paired as a draft.
V3-021