![]()
Employees can be added, removed, and modified within VPass using Microsoft Graph API integration. By defining groups in your Azure Directory, users can seamlessly synchronise with VPass. This method not only streamlines user account management to save time and reduce hassle but also enhances security implementation, making it an optimal choice.
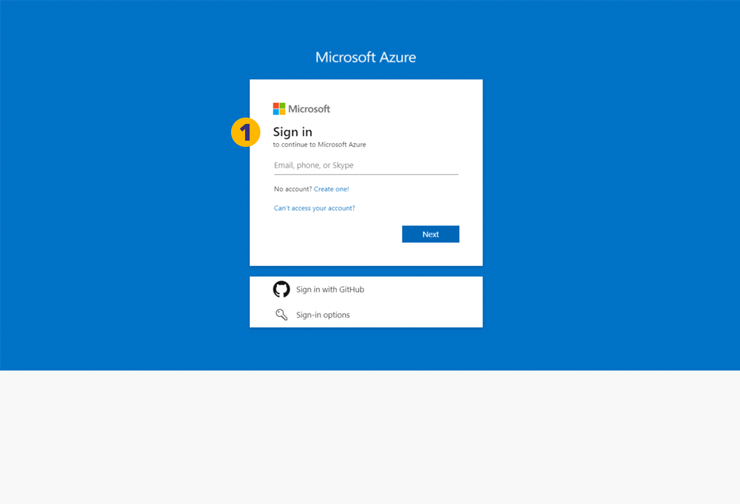
1. Log in to your Microsoft Azure account using valid credentials.
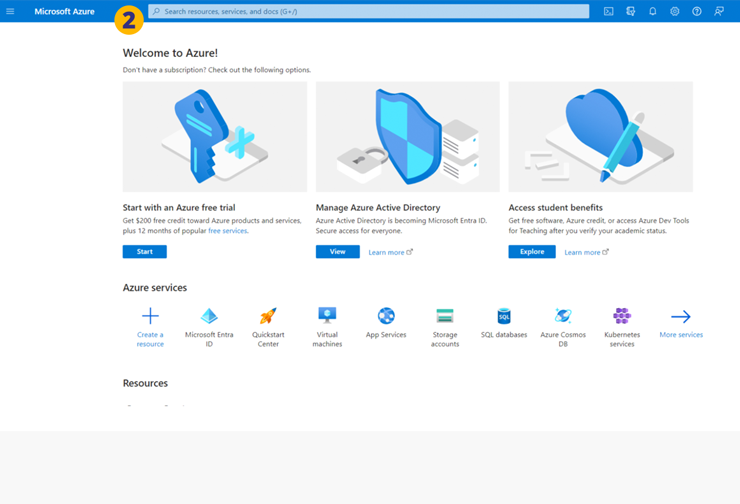
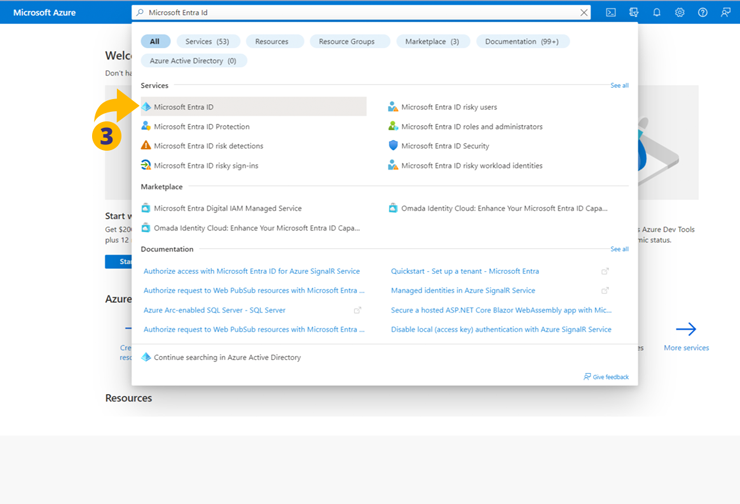
2. Search for a Microsoft Entra ID in the search box.
3. Click on the required Microsoft Entra ID displayed below in the search box.
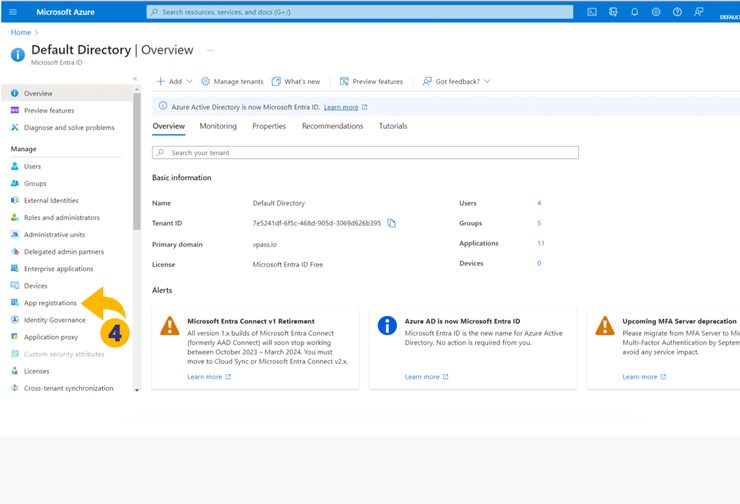
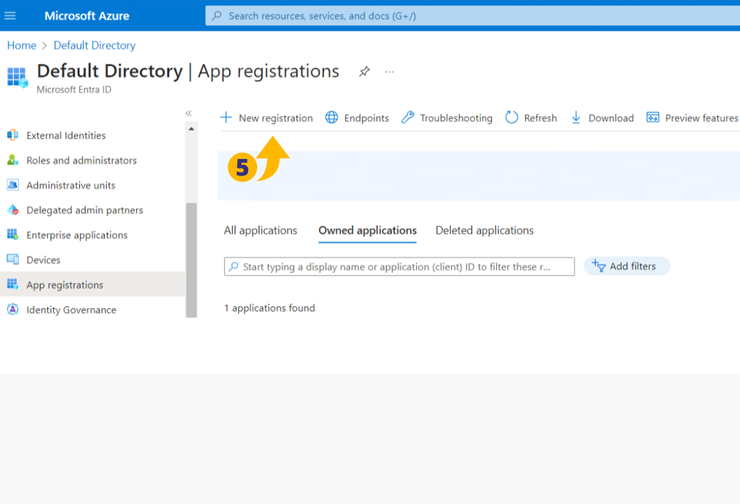
4. In the Overview page, select App registrations.
5. Click on New registration…
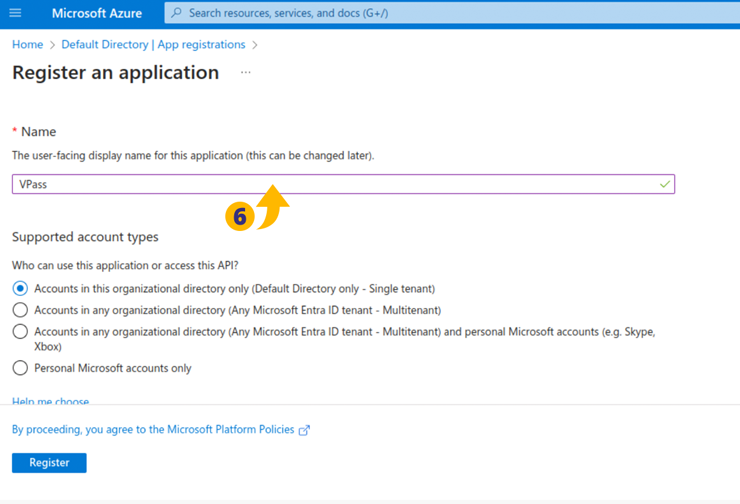
6. Enter the Name eg “VPass”.
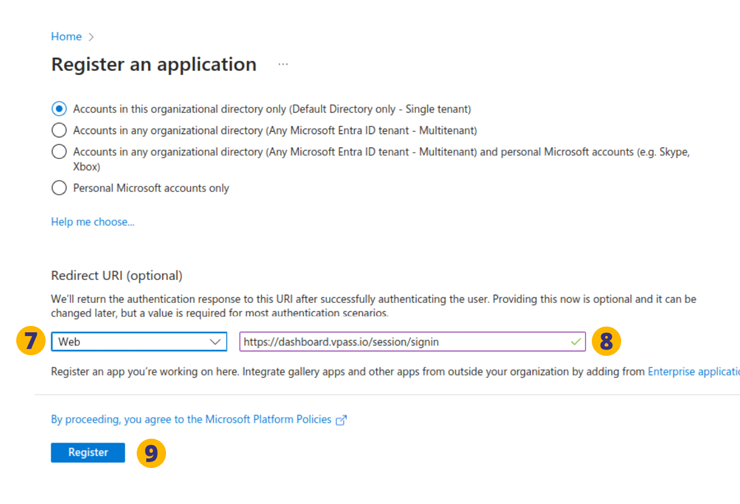
7. Select a Platform (Web) from drop down list and Enter the URL of Application (8).
The Application URL varies according to your region:
Australia & NZ: dashboard.vpass.io
UK, EU & South Africa: dashboard-uk.vpass.io
Canada: dashboard-ca.vpass.io
US & Rest of World: dashboard-us.vpass.io
9. When you are done click on the Register button
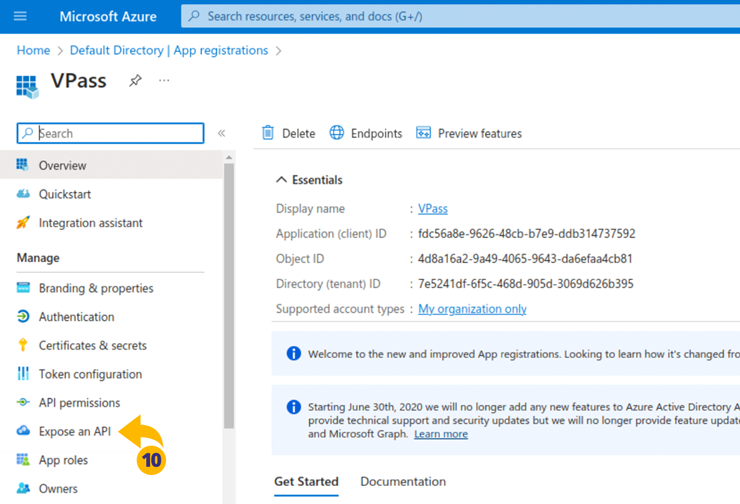
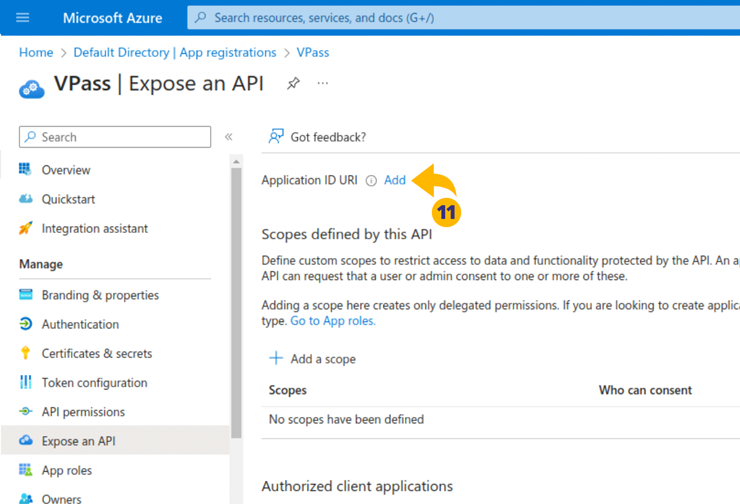
Now that the VPass App is Registered, select Expose an API (10).
11. Click on Add.
12. Click on Save.

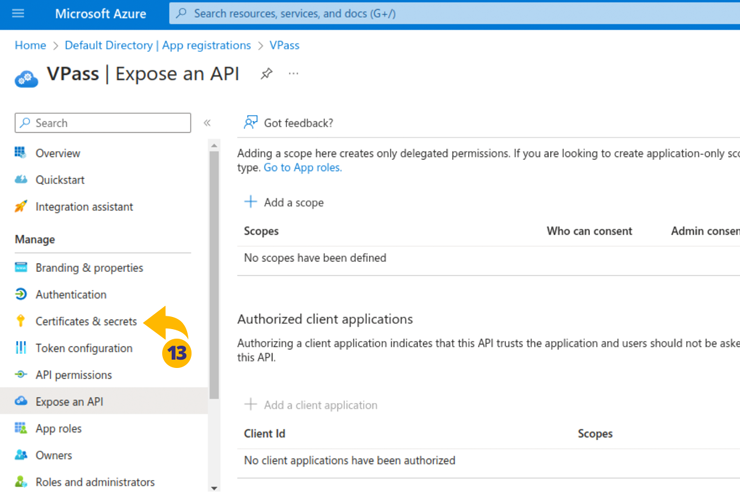
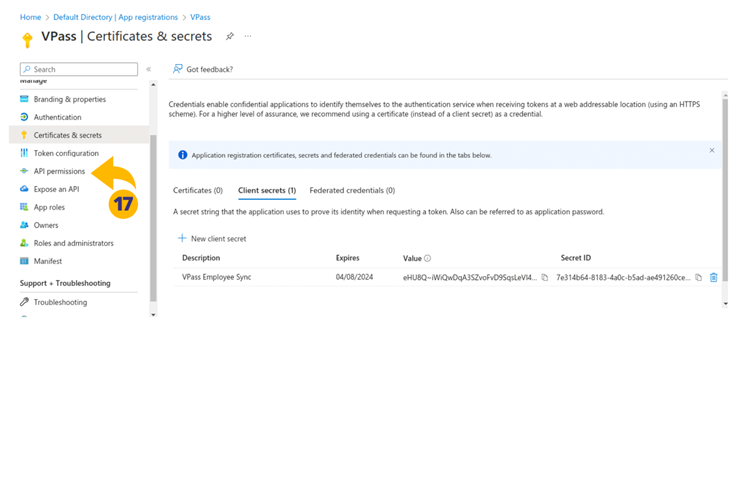
13. Select Certificates & secrets.
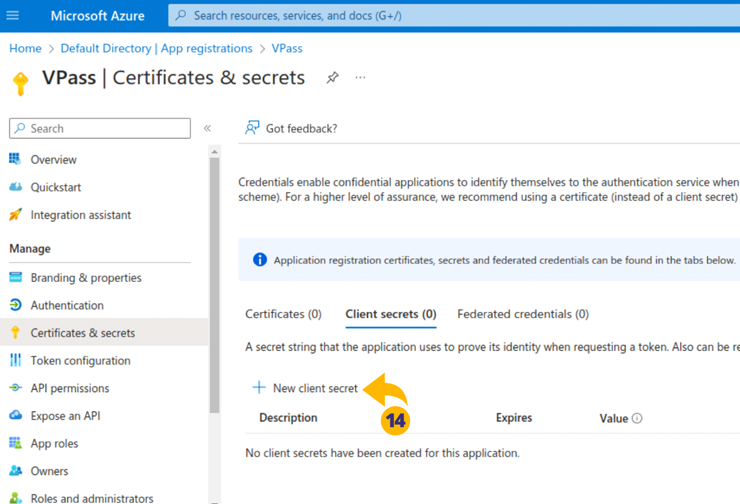
14. Click on New client secret.
15. Enter a Description for this client secret, select an Expires option from drop down list and click the Add button.

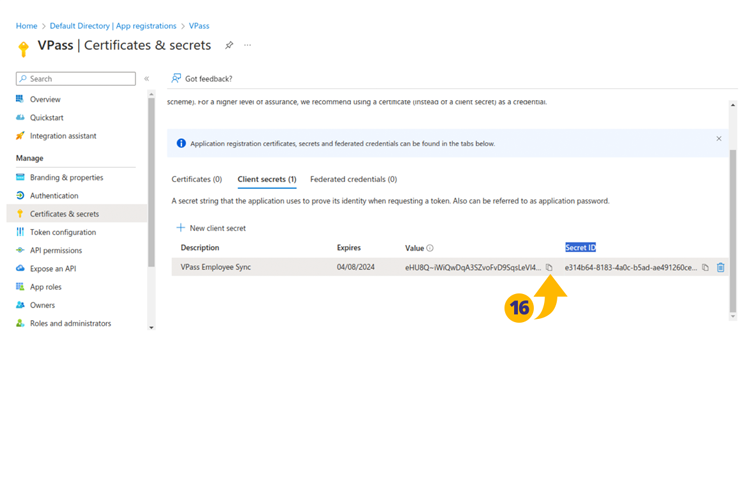
16. Copy the Value and save it somewhere safe. This Value is required for use when connecting the VPass Application (step 27).
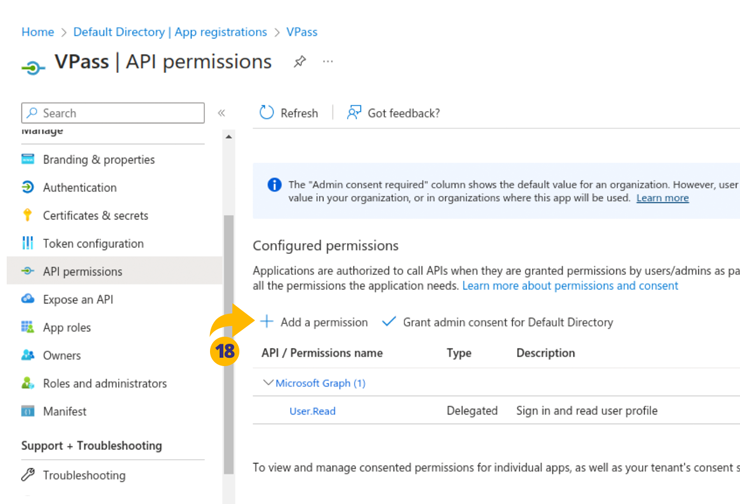
17. Select API Permissions.
18. Click on Add a permission.
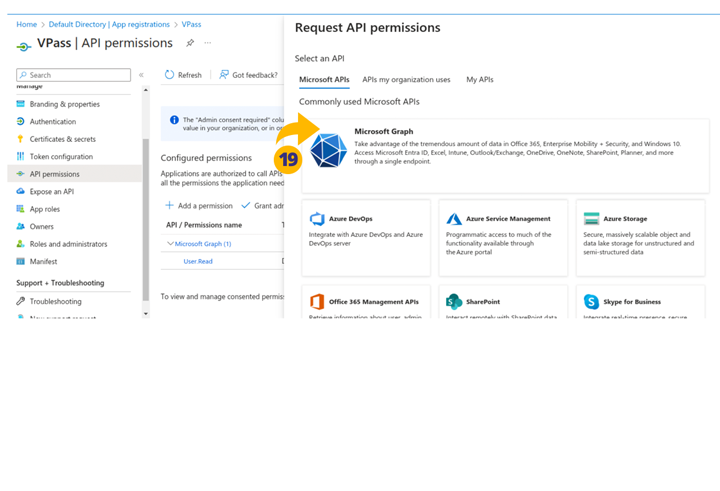
19. Click on Microsoft Graph.
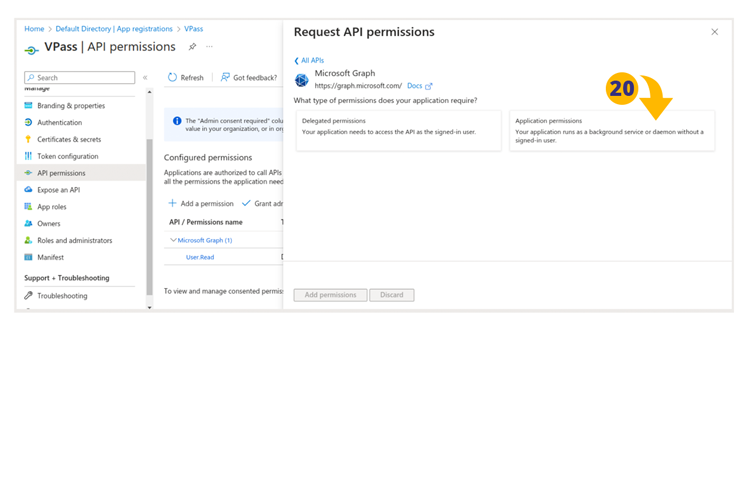
20. Click on the Application permissions.
21. Enter the term “User” in search box and scroll down and click on “User”.
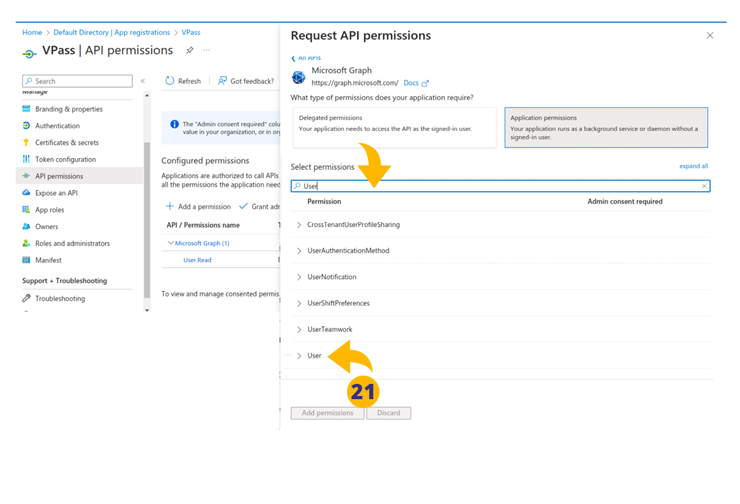
22. Select “User Read All” checkbox and click the Add permission button.

23. Enter the term “Group” in search box and and Click on Group.
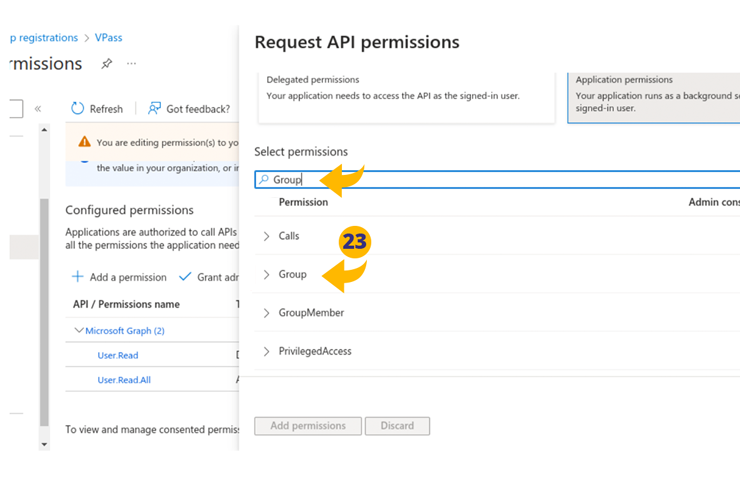
24. Select “Group Read All” checkbox and click the Add permission button.

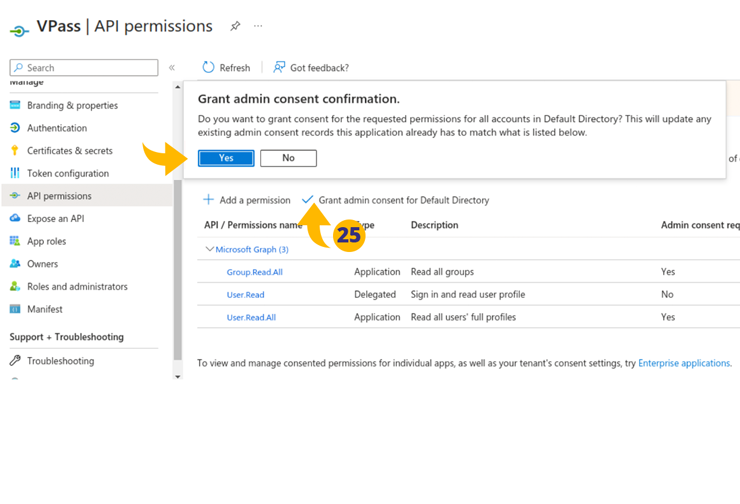
25. Click on Grant admin consent for Default Directory checkbox and then click on the confirmation Yes button.
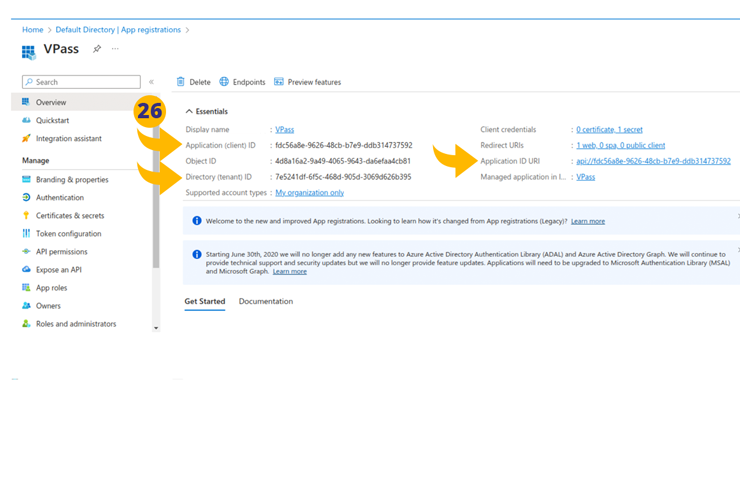
26. On the Overview page, make copies of the following:
• The Application (client) ID.
• The Directory (tenant) ID.
• The Application ID URI.
Also have handy the Client secret code from step 16.
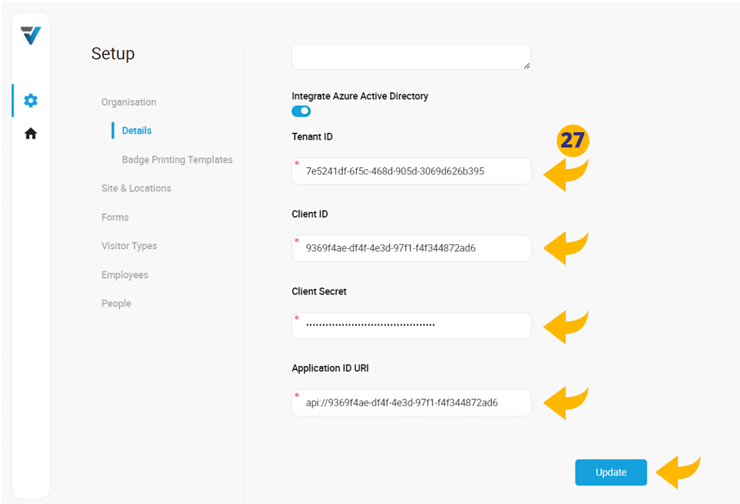
27. Open VPass dashboard and go to the admin cog icon > Organisation > Details page.
Toggle on the Integrate Azure Active Directory section and add the following…
• The Directory (tenant) ID.
• The Application (client) ID.
• Client secret code.
• The Application ID URI.
…and then click on Update button.
V3-086