![]()
1. In your admin, navigate to the cog icon.
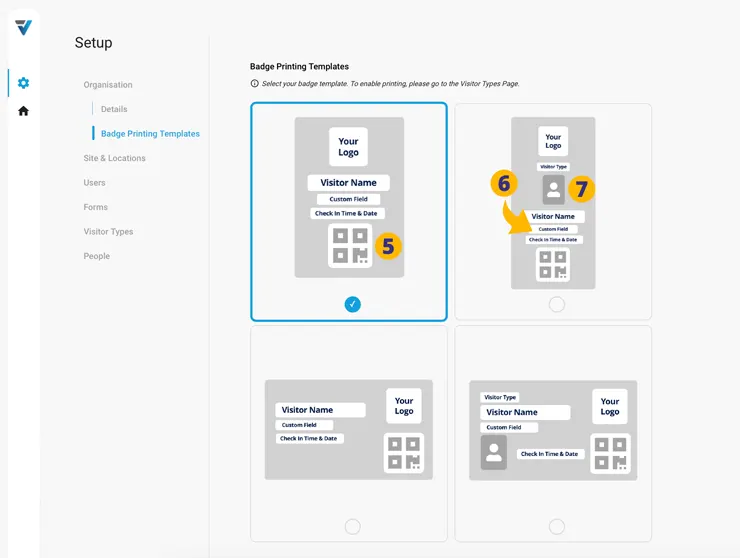
2. Select Organisation > Badge Printing Templates (3).
4. By default a portrait template is selected.
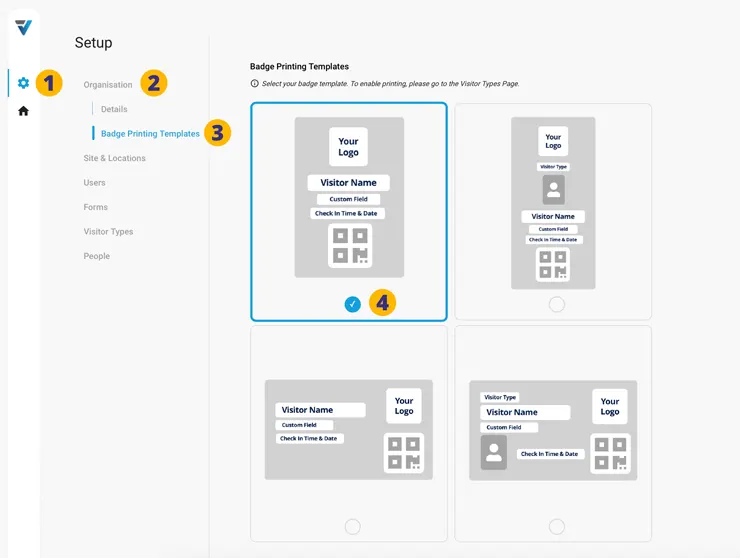
The Badge Printing Templates may include…
5. A QR Code for scanning at sign out. At the Kiosk the visitor uses the black QR button at the foot of the home screen.
6. An optional Custom Field from the sign in Form. This is configured at the Visitor Type level. In your admin cog icon > Visitor Types page, use three dots menu to Edit the relevant listing. Near the bottom of the sidebar there is a drop down menu titled “Add a Custom Field to your Printed Badge”.
7. Visitor Photo (if configured on your Forms page).
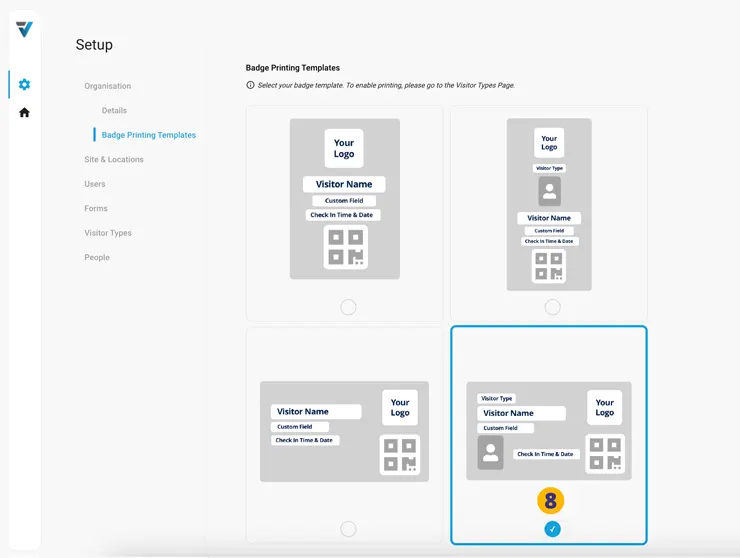
8. Select a Badge Printing Template…
Enabling Printing and Custom Fields
You may now wish to proceed to configure a custom field that will display on the printed badge. The custom field is pulled from the sign in Forms used by each Visitor Type with the print feature enabled.
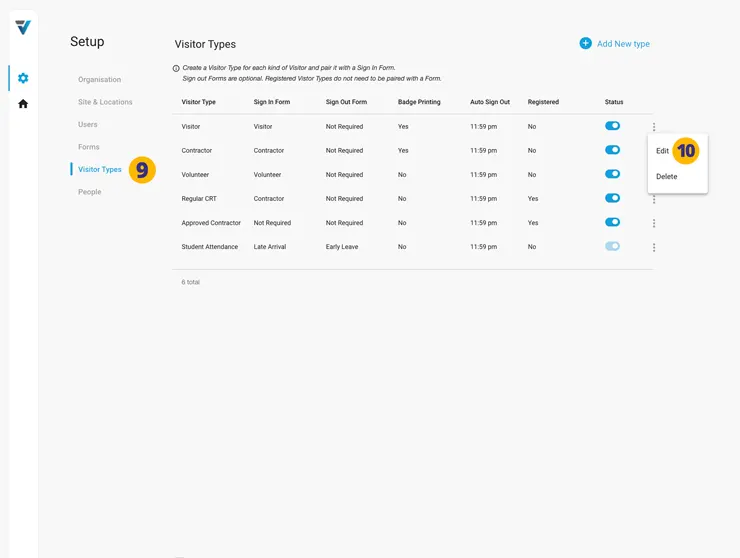
9. Navigate to the cog icon > Visitor Types page
10. Edit the Visitor Type you wish to use for printing.
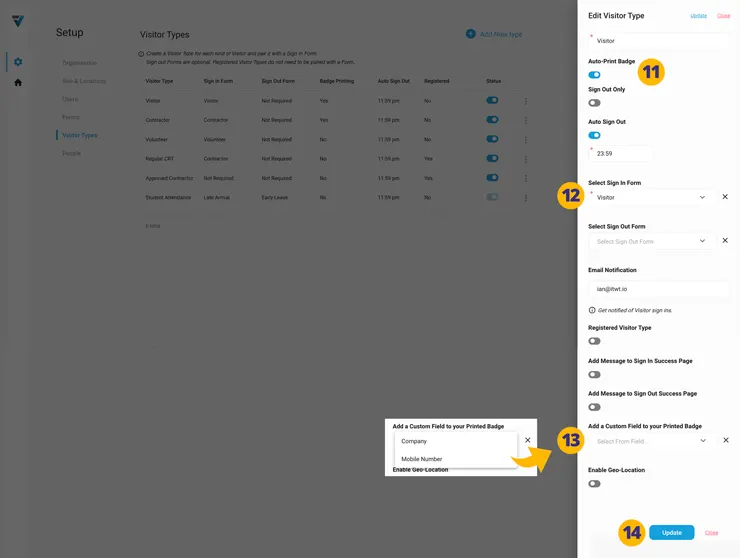
A sidebar will come up…
11. Ensure that the Auto-Print Badge option is turned on.
12. Ensure that a Sign in Form has been selected.
13. Use the Add a Custom Field to your Printed Badge dropdown menu to select the field data you wish to display on your printed badge. For example the Company field.
14. Update the changes.
Your printed badge will now use the selected template and will display the optional Custom Field.
V3-071

