Having a range of Visitor Types will allow you to customise the sign in experience for each. These might include Visitor, Contractor, Staff, Regular Visitor, Contract Relief Teachers, Volunteers etc.
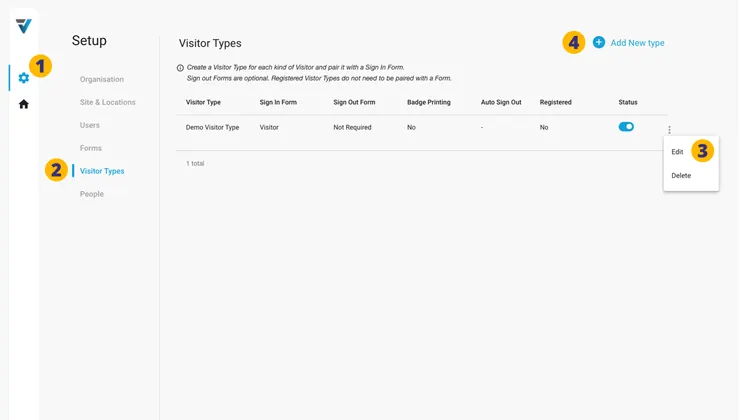
1. Go to your Admin Setup page (cog icon).
2. Select Visitor Types.
3. A demo Visitor Type has already been setup. To customise this to your needs, select the three dots on the right hand side. A small menu will come up. Select Edit.
4. If wishing to create a new Visitor Type from scratch select Add New Type.
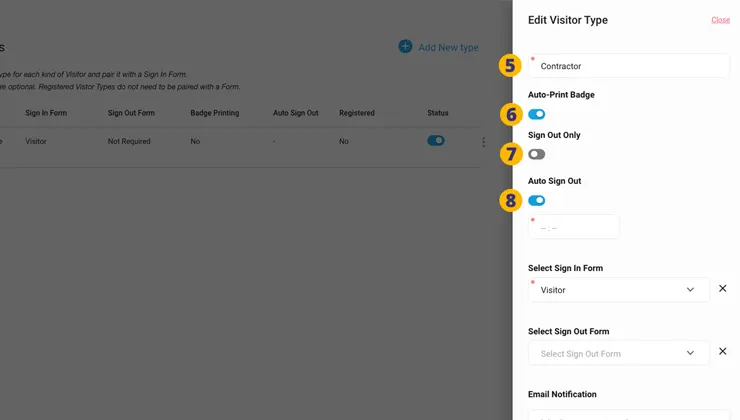
Lets choose Edit (3). A sidebar will appear on the right hand side.
5. Name your Visitor Type eg: “Contractor”
6. If wish to use the badge printing feature, turn it on here. For further instructions on how to setup your printer, please refer to this collection of help articles.
7. If the Visitor Type does not require a sign in time to be collected, you may set it as Sign Out Only. This might be good for school students leaving early etc.
8. Set the time for an Auto Sign Out. For Visitor Types like Visitor, Contractor etc. this might be 5pm or at the very end of the day (11.59pm).
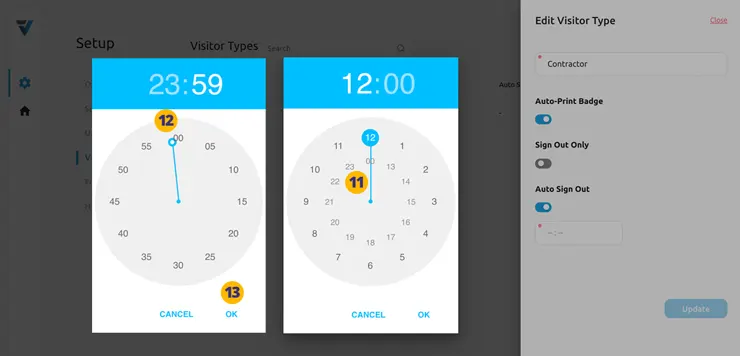
To select an Auto Sign Out time, click on the “–:–” icon in text field (9).
10. A popup time selector will appear.

Let say for example you wish to select an Auto Sign Out time of 11:59pm.
11. Firstly choose the hour as “23”.
The minutes selector will appear. Rotate the minute hand to “59” (12).
The sign out time is now set to “23:59”. Select OK (13).
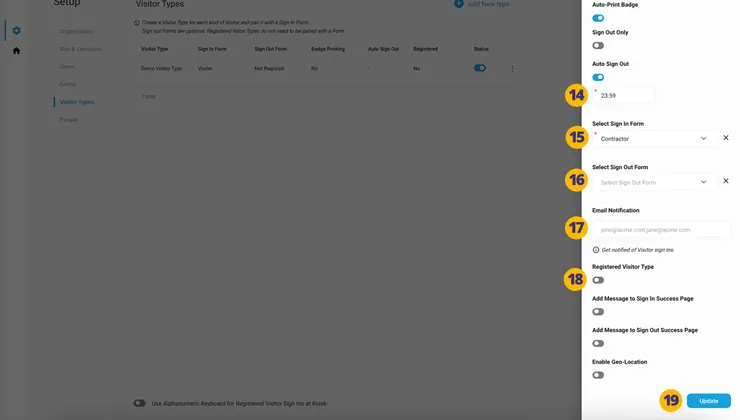
14. The Auto Sign Out time is now recorded as “23:59”.
Getting back to the other configuration options for your Visitor Type…
15. Select the relevant sign in Form from those you created earlier on your Forms page.
16. A second Form can be shown at visitor sign out, but this is usually left blank.
17. Optionally, enter an email address that will be notified when a visitor signs in under this Visitor Type. Comma seperate multiple email addresses.
18. Leave Registered Visitor Type toggled off. If wishing to create Visitor Types for pre-registered visitor sign ins, please refer to this help article.
19. To complete the process, select Update.
20. The new or updated Visitor Type will appear in the listing.

V3-020