![]()
![]()
Why use a Network rather than AirPrint or Bluetooth?:
The Network option is provided for printer connections that are more complex.
AirPrint and Bluetooth print connection options are the likely first choice for connecting your Brother QL-820NWB to the VPass Kiosk, as they allow simple and robust connections.
However, by using the Network option you can have a network-connected printer located by it’s IP address.
Furthermore, network printing uses the Brother’s SDK, ensuring enhanced reliability and expedited printing capabilities for badges. In instances where proxy settings or other limitations prevent the access of the network Printer, the AirPrint option can be used as an alternative.
.
Brother QL-820NWB Printer Setup
1. Download the Brother Quick Setup Guide here and complete steps 1-9.
2. For the steps below you will need:
- Wi-Fi network name
- Wi-Fi network password (Network Key)
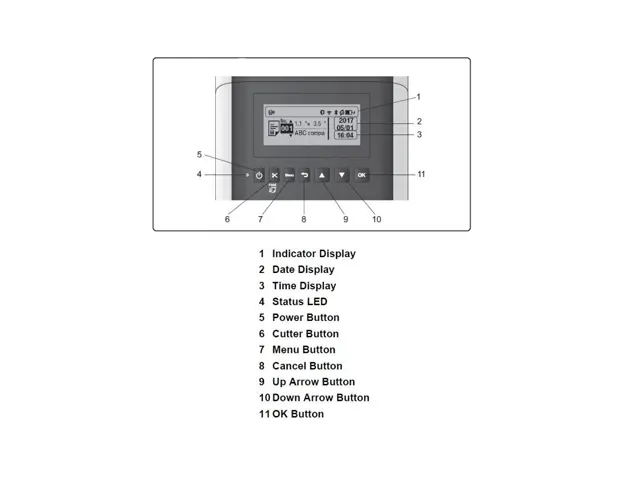
3. Press the [Menu] button.
4. Use the [▲] and [▼] buttons to select WLAN > WLAN (On/Off) > On in the settings menu. Press [OK].
5. Use the [▲] and [▼] buttons to select WLAN > Infra Manual Setting in the settings menu. Press [OK].
6. Your printer will search for available Wi-Fi networks. Remember, your printer and iPad will need to be on the same network.
7. Use the [▲] and [▼] buttons to select your desired network. Press OK.
8. Enter your password.
9. Look in the top right of the screen. Press [Menu] to switch between uppercase, lowercase, numbers and symbols.
10. Use the [▲] and [▼] buttons to select the correct characters.
11. If it connects, it will say “Connected!” Press [OK]. If it does not connect, repeat steps 5 through 7.
12. Press the [ ] button to return to the main screen. You should see the Wi-Fi icon in the top right.
Pair the printer with the iPad
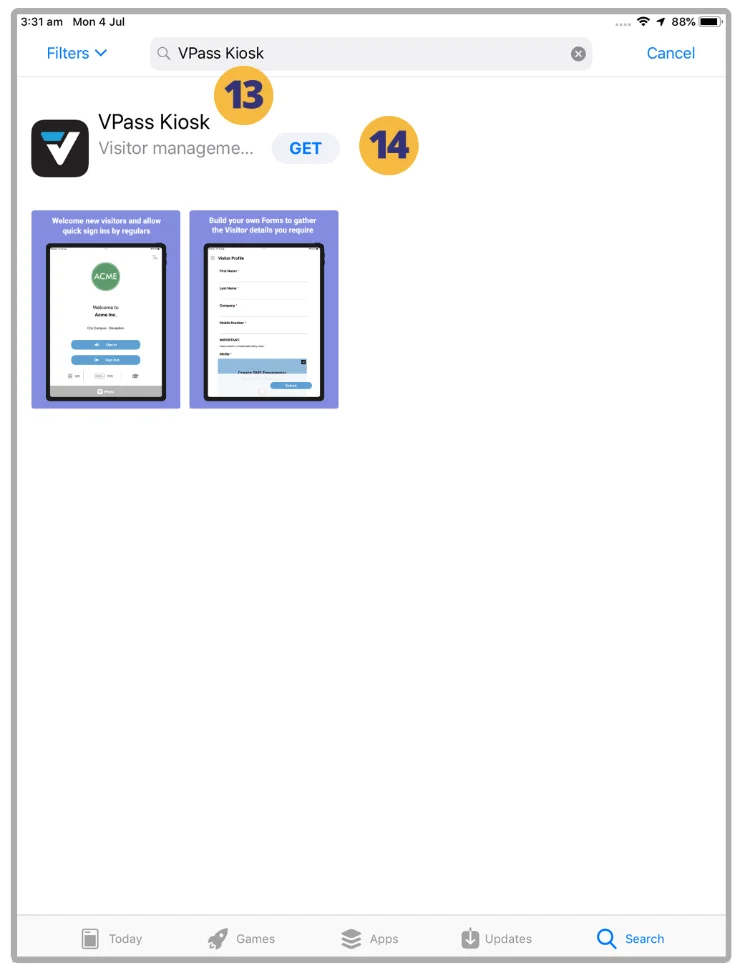
13. On the iPad’s App Store, do a search for “VPass Kiosk”.
14. Download the App (You will need an Apple ID to do this).
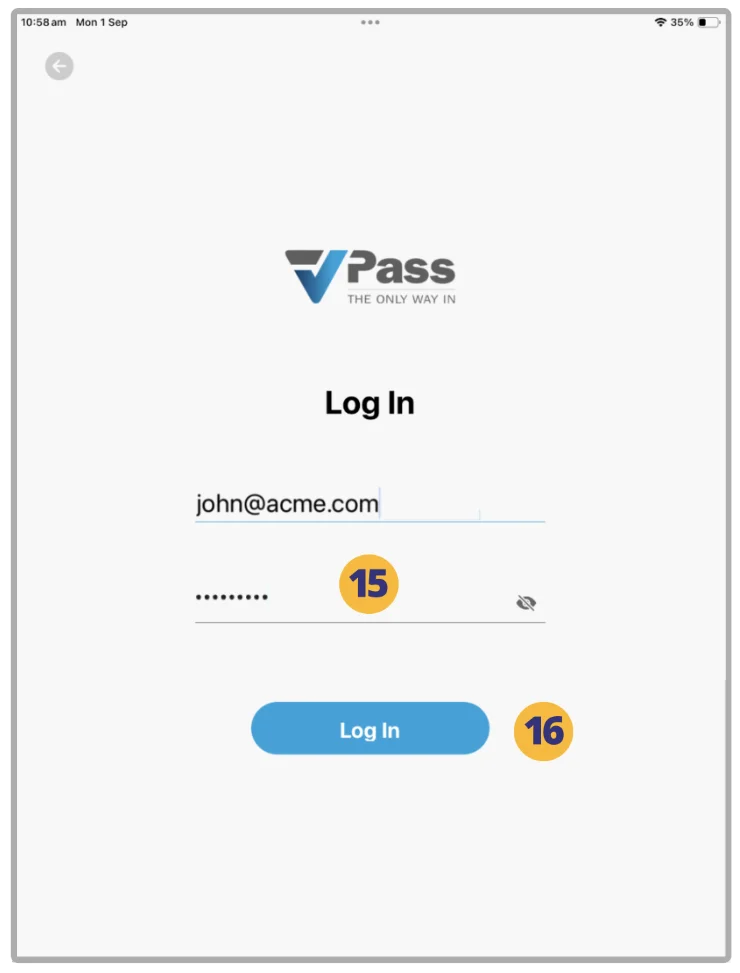
15. Enter your Account Owner, Super Admin or Admin password… and tap Login (16).
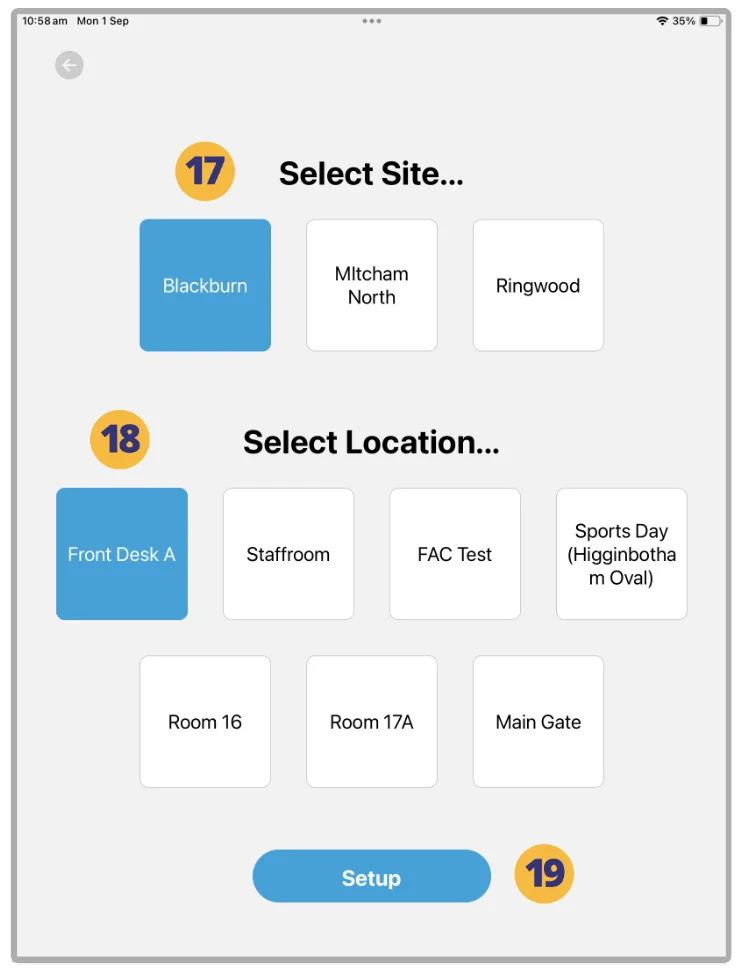
You will then be prompted to assign the Site (17) and Location (18) for this device.
19. Tap Setup.
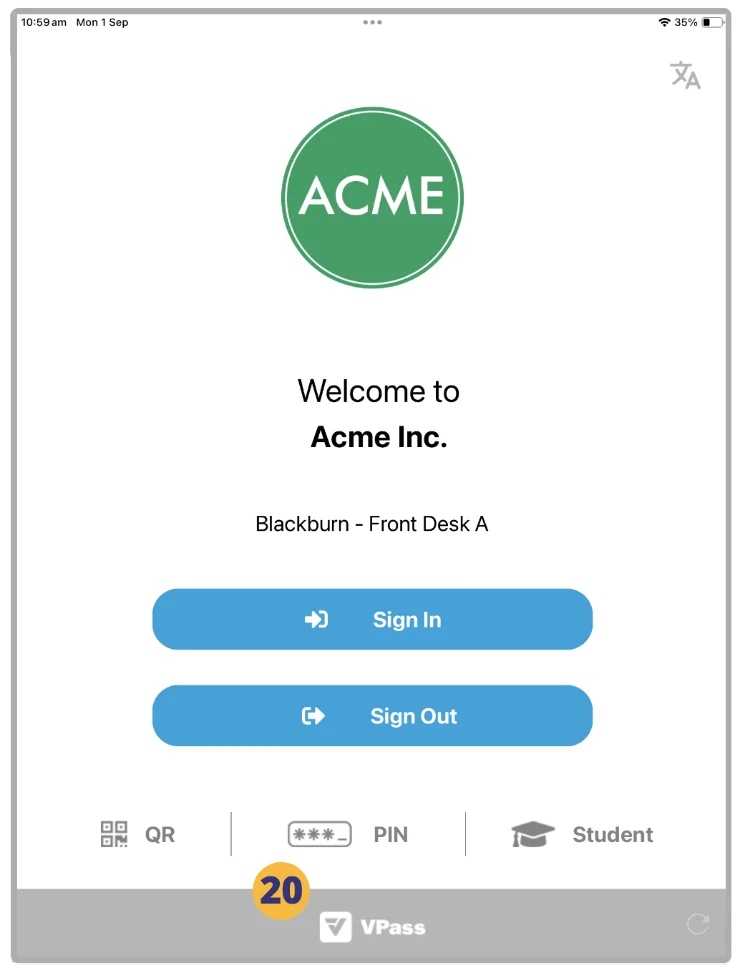
20. Upon reaching the home screen, tap and hold the VPass Logo in the grey footer bar for 10 seconds.
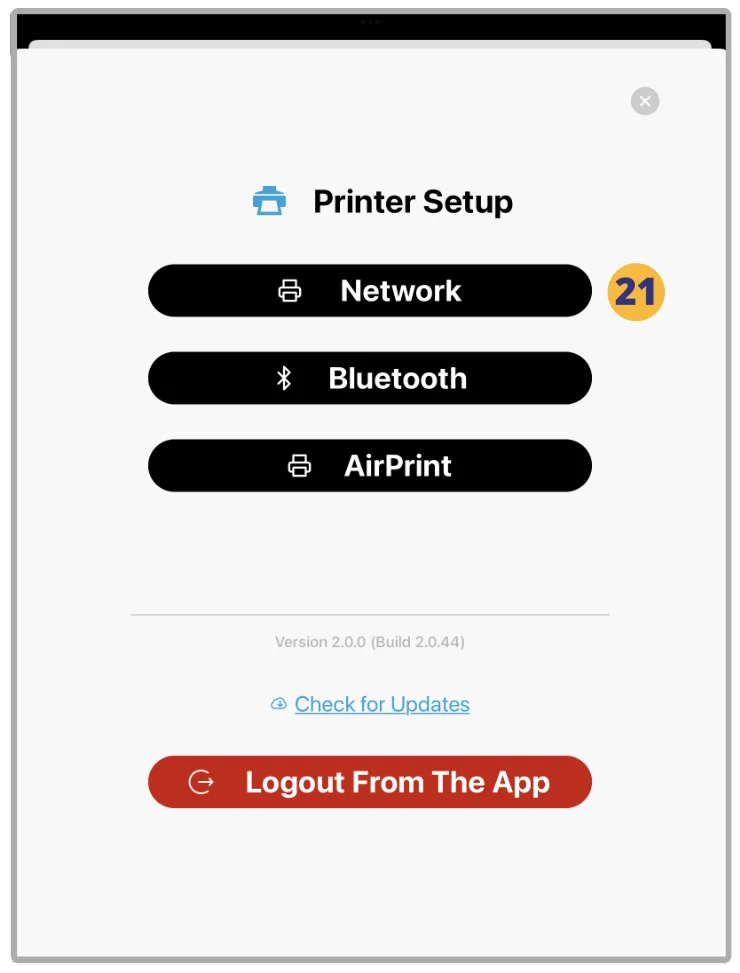
When the Printer Setup window comes up, select AirPrint (21).
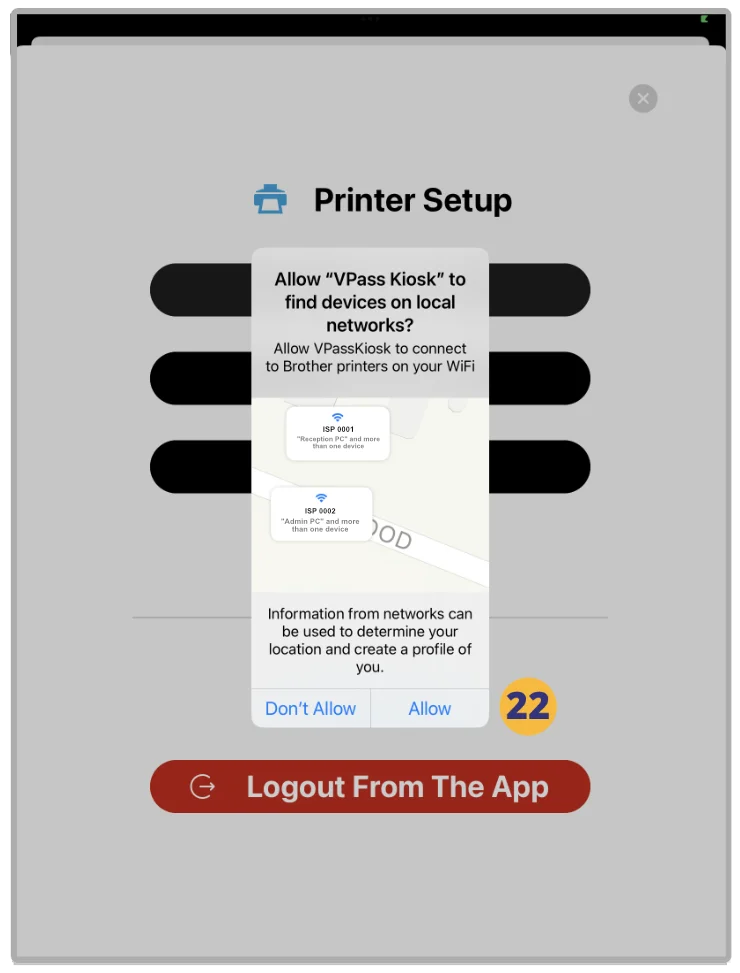
22. A dialogue box will come up regarding network access. Tap Allow.
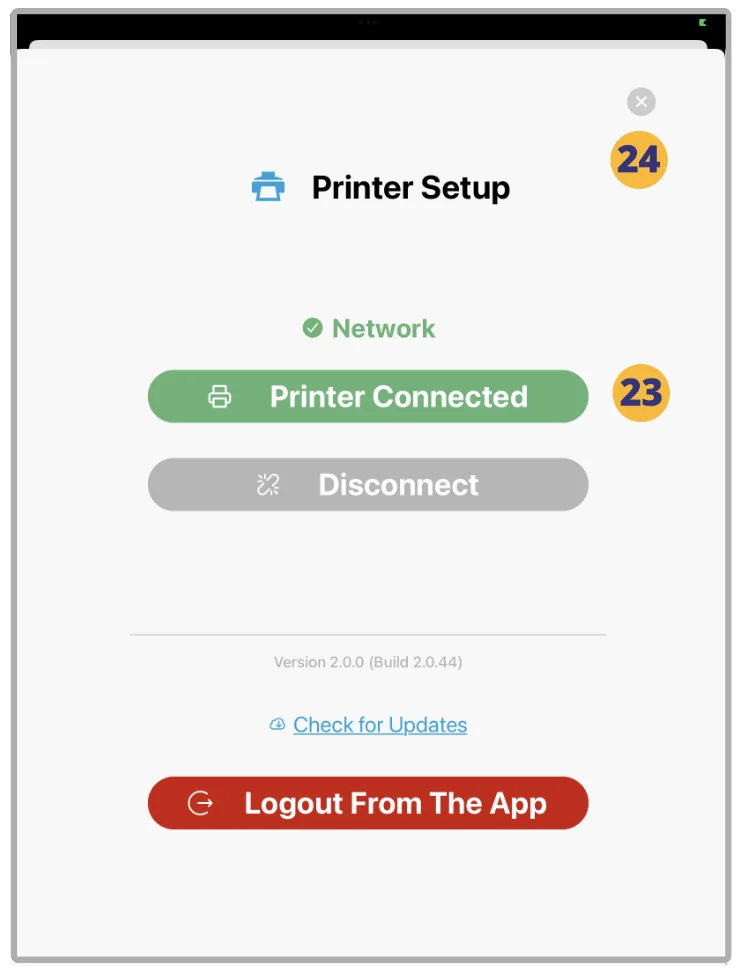
23. Your AirPrint printer is now connected. Close the window (24).
Assuming a Visitor Type has the Print feature enabled, you will be able to do your first sign in with a printed badge.
Whitelisting
You may need to whitelist the following URLs on your Wi-Fi server. These vary according to your country:
V3-113