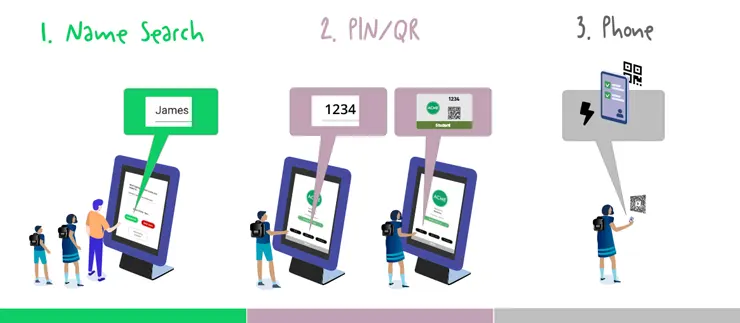
Sign In Methods
There are three sign in methods for Students…
Students records are created individually or via bulk upload in the admin Registered Visitors > Students page.
Bulk Upload of Student Records
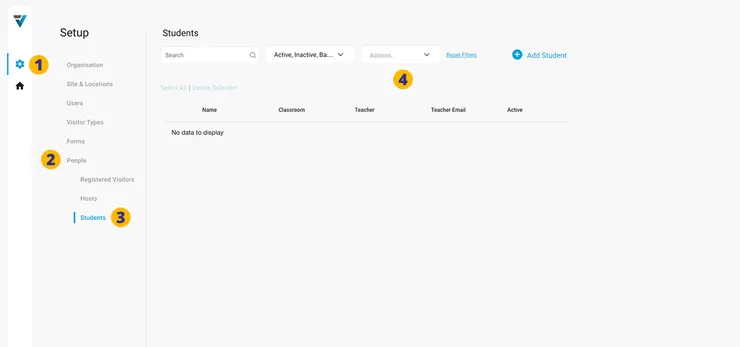
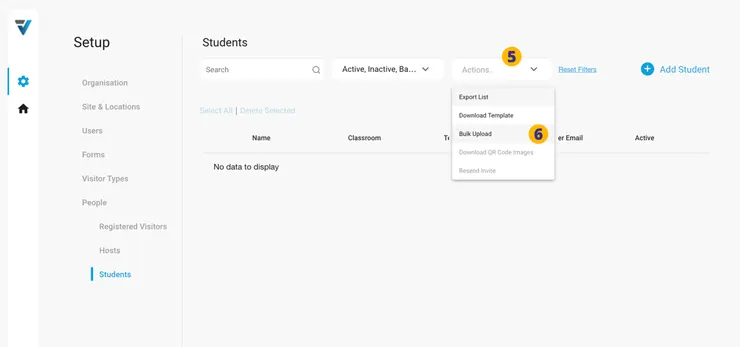
Go to your Admin Setup page (cog icon) (1).
2. Select People.
3. Then select Students.
4. From the Actions drop down menu, select Download Template.
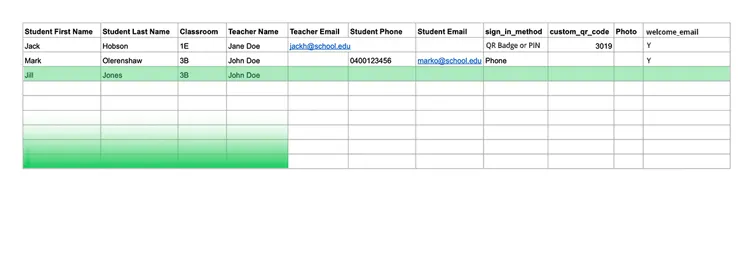
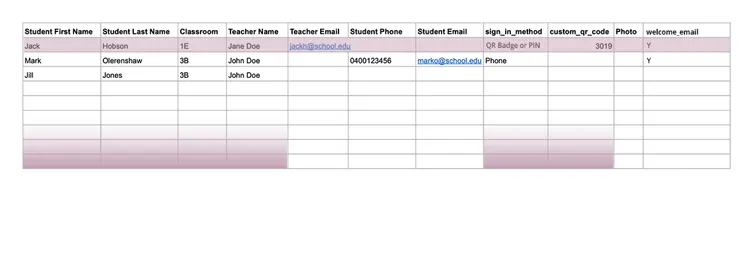
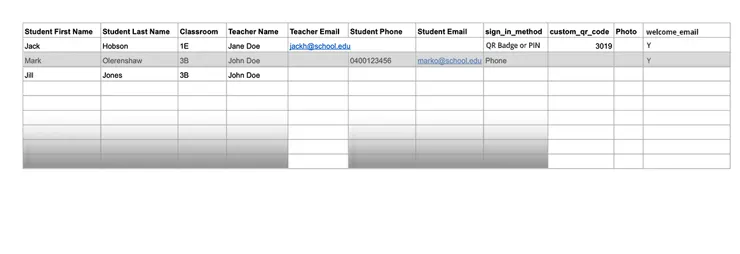
Use the the Student-Upload-Template.xlsx. file and it’s sample data as a guide.
Depending on the Sign In Method, different columns are required when populating the data in the Student-Upload-Template.xlsx. file.
A. Student Name Search Sign Ins
FIELDS:
- Student First Name
- Student Last Name
- Classroom
- Teacher Name
- Teacher Email (OPTIONAL: if teacher email notifications are required)
Next: Upload your file.
B. Student PIN/QR Sign Ins
FIELDS:
- Student First Name
- Student Last Name
- Classroom
- Teacher Name
- Teacher Email (OPTIONAL: if teacher email notifications are required)
- sign_in_method (Use “QR Badge or PIN” for each record)
- custom_qr_code (The PIN code that the student will use at sign in… or the content of QR code image they will scan at sign in).
- welcome_email (If the Student Email field is filled, the student will receive an instructional welcome email. Enter “Y”. Leave blank if not required ).
Next: Upload your file.
C. Student Phone Sign Ins (at QR Code Poster)
- Student First Name
- Student Last Name
- Classroom
- Teacher Name
- Teacher Email (OPTIONAL: if teacher email notifications are required)
- Student Phone
- Student Email
- sign_in_method (Use “Phone” for each record)
- welcome_email (If the Student Email field is filled, the student will receive an instructional welcome email. Enter “Y”. Leave blank if not required ).
Next: Upload your file.
Uploading your file
To upload your completed file, again use the Actions (5) menu but this time select Bulk Upload (6).
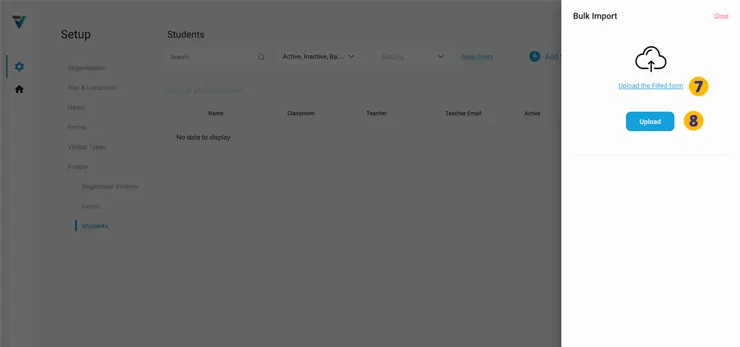
Select “Upload the Filled Form” (7) and add your xlsx. file.
8. Click Upload to complete the process.

…not a vertical one:

This needs to be done for individual entries or bulk .xlsx uploads. The correct keystroke to use on a Windows device is alt+0146 and on Mac option+shift+”]”.
Create an Individual Student Record
Go to your Admin Setup page (cog icon) (1).
2. Select People.
3. Then select Students.
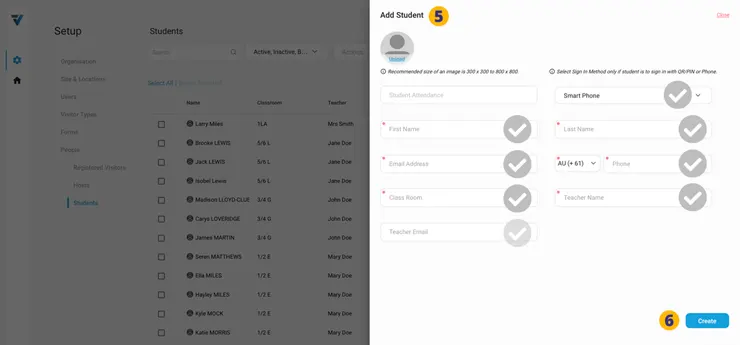
4. Click the Add Student button.
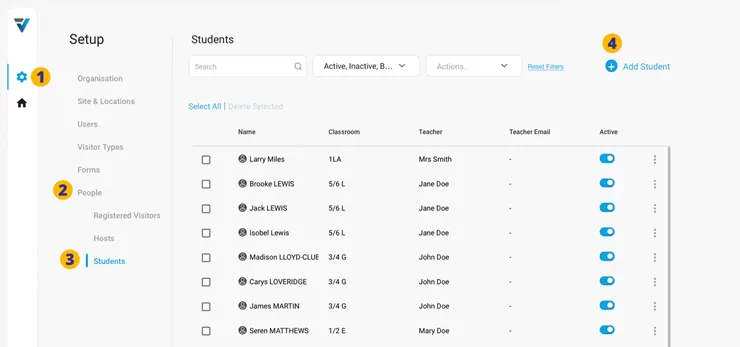
5. The Add Student sidebar comes up on the right hand side.
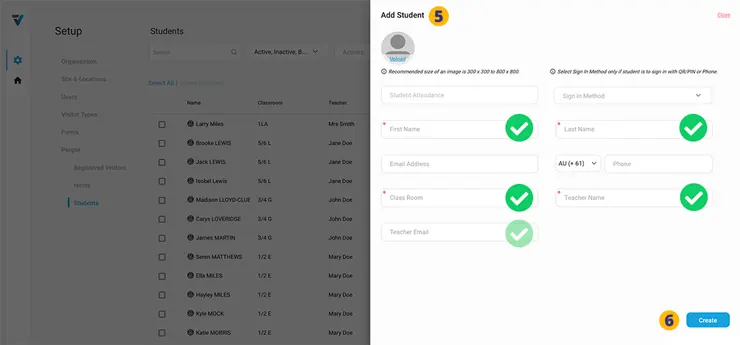
Depending on the sign in method, fill the fields in one of three ways listed below in sections D,E,F.
6. To finish, click the Create button (bottom right).
D. For Student Name Search Sign Ins
FIELDS:
- Student First Name
- Student Last Name
- Classroom
- Teacher Name
- Teacher Email (OPTIONAL: if teacher email notifications are required)
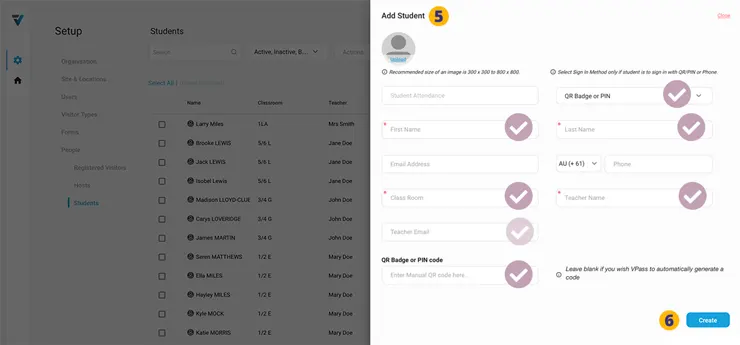
E. For Student PIN/QR Code Sign Ins
FIELDS:
- Sign in Method (Use “QR Badge or PIN”)
- Student First Name
- Student Last Name
- Classroom
- Teacher Name
- Teacher Email (OPTIONAL: if teacher email notifications are required)
- QR Badge or PIN code (The PIN code that the student will use at sign in… or the content of QR code image they will scan at sign in).
F. For Student Phone Sign Ins (at QR Code Poster)
FIELDS:
- Sign in Method (Use “Phone” for each record)
- Student First Name
- Student Last Name
- Classroom
- Teacher Name
- Teacher Email (OPTIONAL: if teacher email notifications are required)
- Student Phone
- Student Email
V3-066